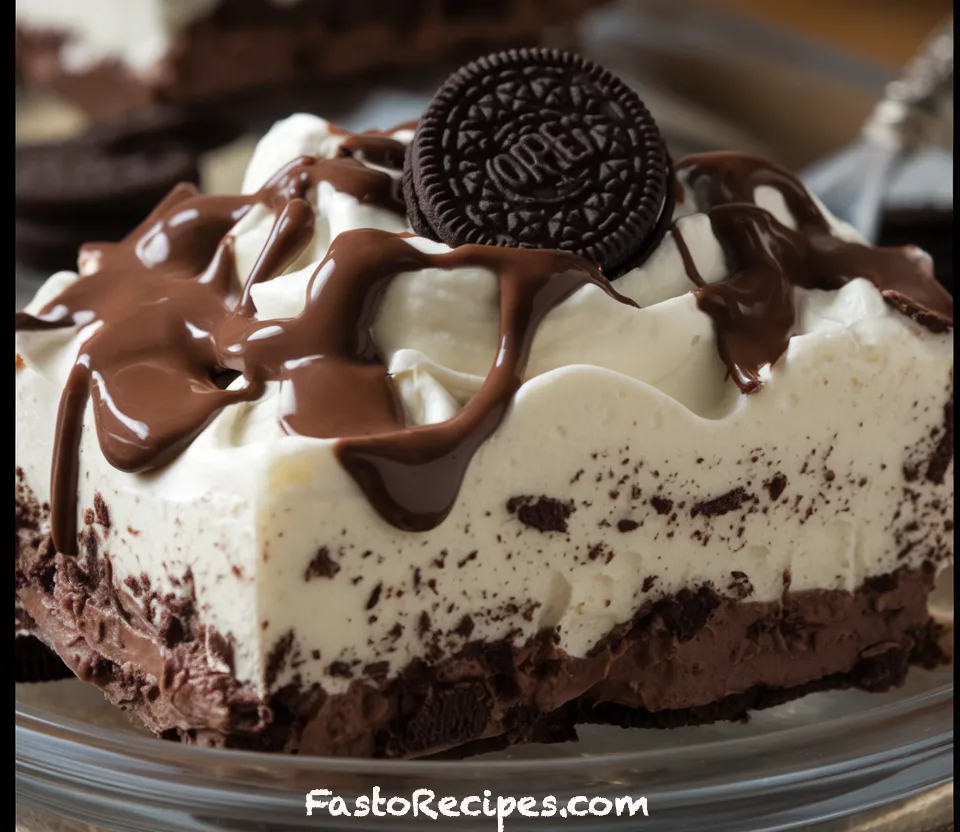
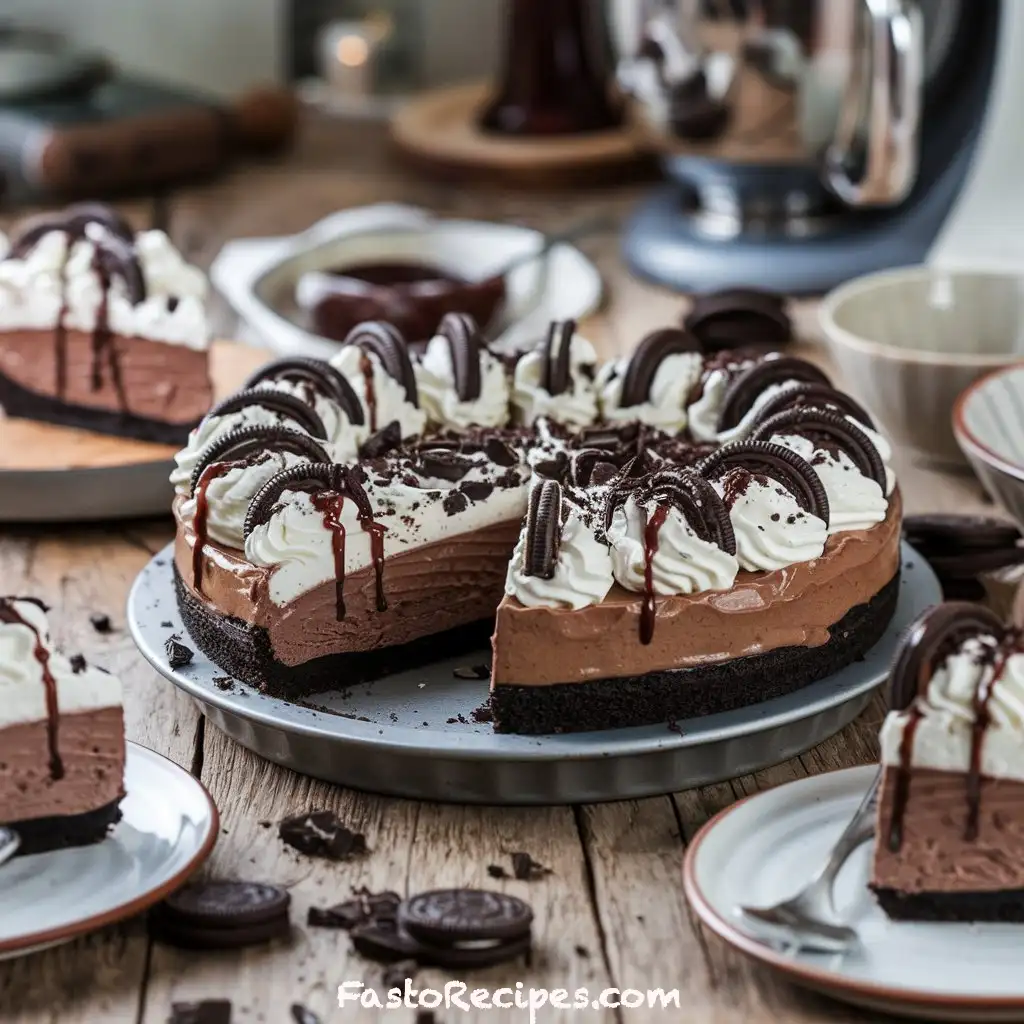
If you’re a fan of indulgent desserts that are both easy to make and absolutely delicious, this No-Bake Oreo Mud Pie is about to become your new favorite treat! Picture this: a creamy, rich chocolate pudding layer topped with a smooth cream cheese filling, all sitting on a crunchy, buttery Oreo crust. And the best part? No baking required! Whether you’re hosting a family gathering, planning a casual dinner, or just craving something sweet, this pie checks all the boxes—effortless, satisfying, and perfect for any occasion. Plus, with just a few simple ingredients like Oreos, whipped topping, and instant pudding, you can whip up this dessert in no time! Ready to dig in? Let’s dive into the recipe!
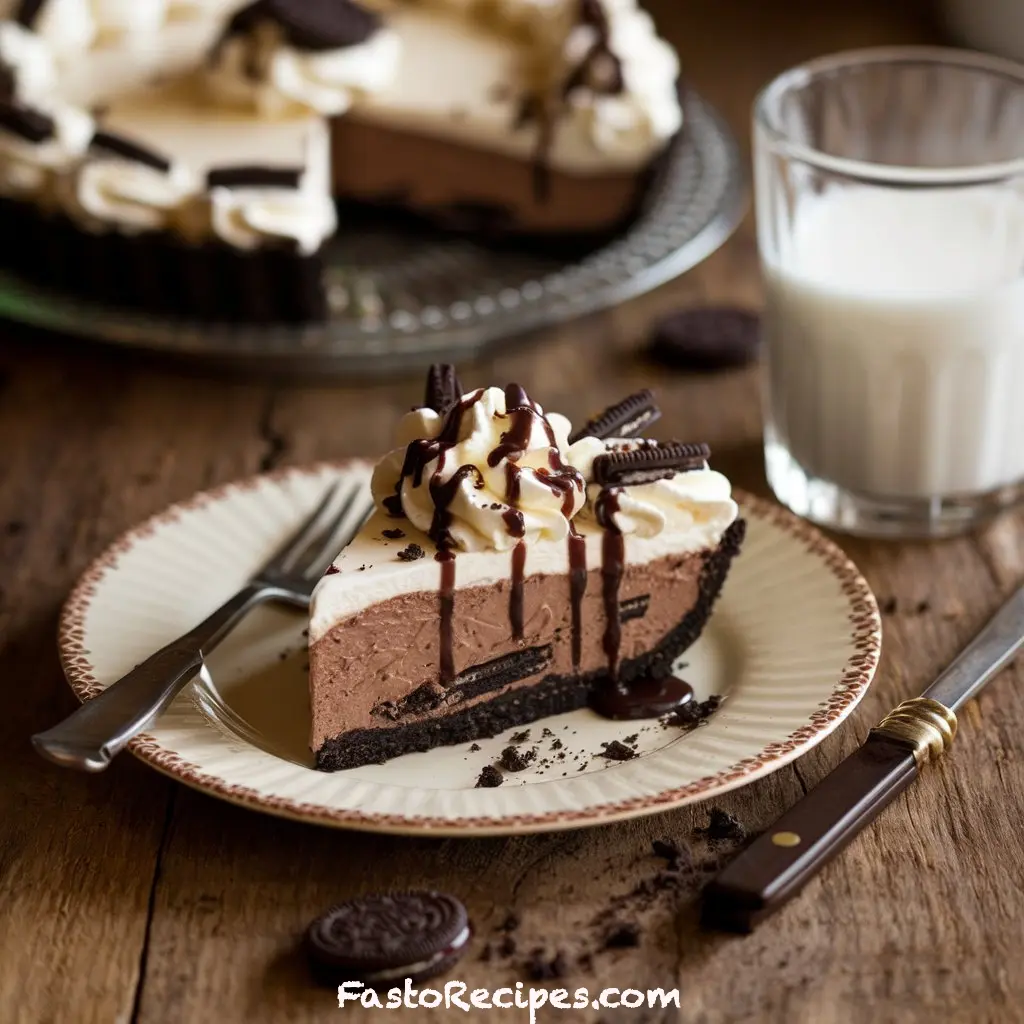
Table of Contents
1. Key Benefits of This No-Bake Oreo Mud Pie
This No-Bake Oreo Mud Pie isn’t just delicious—it’s also incredibly easy to make! If you’re someone who loves indulgent desserts but doesn’t want to spend hours in the kitchen, this treat is a game-changer. Here’s why you’ll fall in love with it:
- Minimal Prep Time: With just 20 minutes of hands-on time, you’ll be well on your way to a creamy, dreamy dessert without breaking a sweat.
- No Baking Required: Say goodbye to preheating the oven! This dessert is completely no-bake, making it a perfect choice for hot days or when you’re craving something sweet without the extra effort.
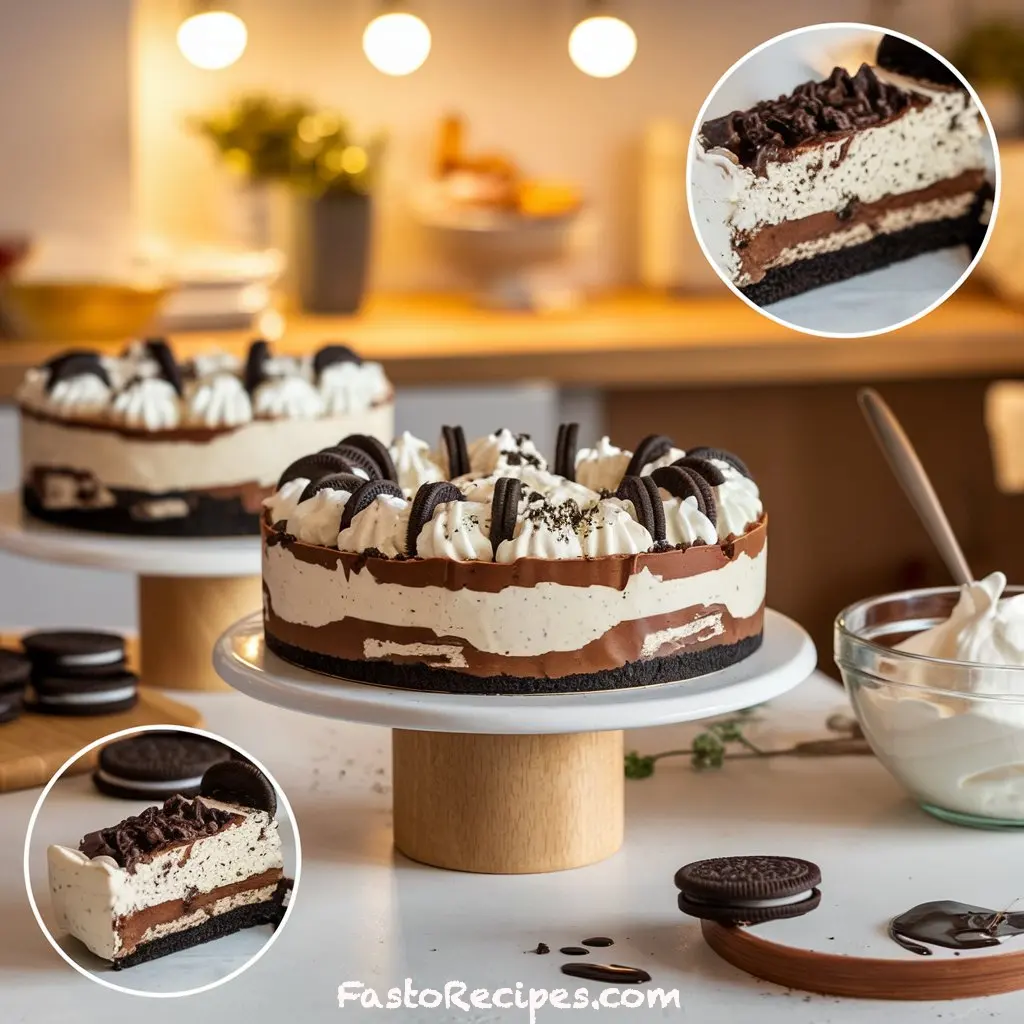
- Rich and Creamy Layers: Between the buttery Oreo crust, the silky cream cheese layer, and the indulgent chocolate pudding, each bite is a satisfying blend of textures and flavors.
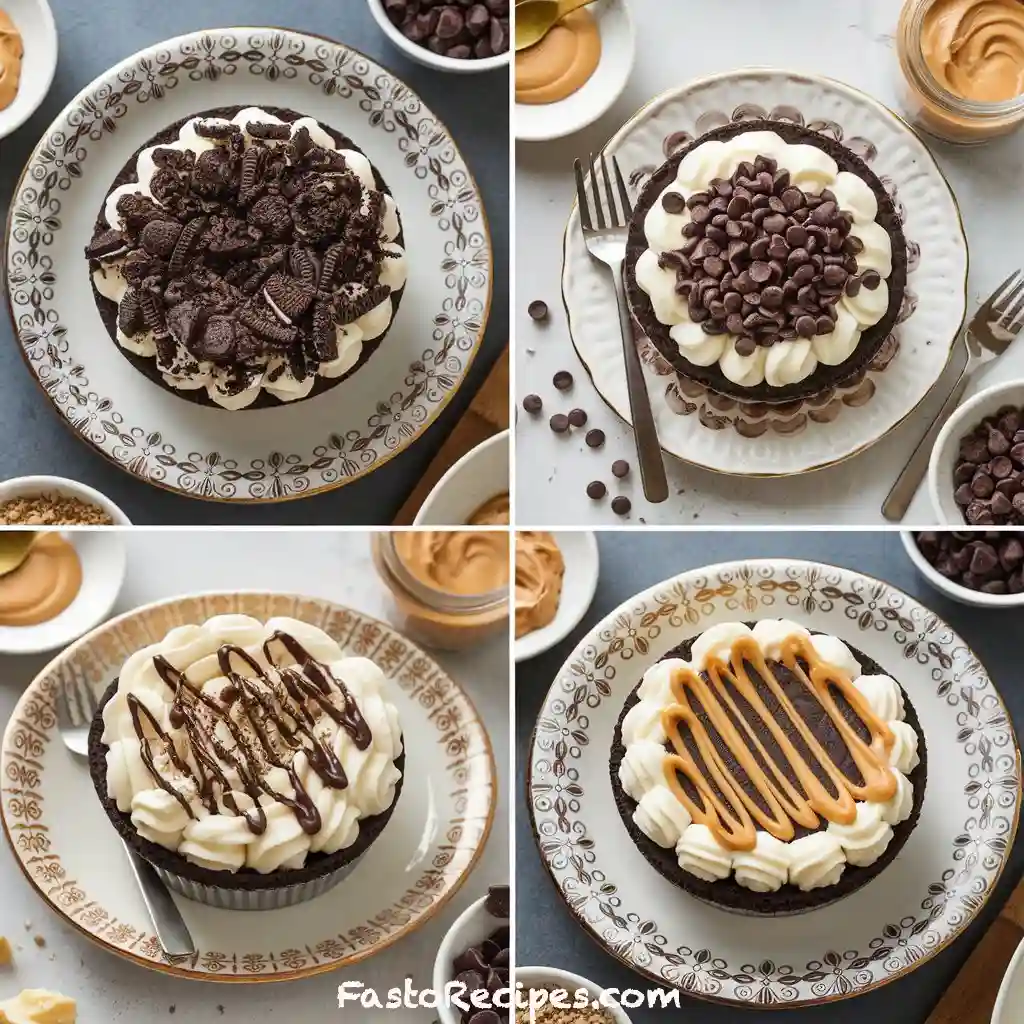
- Versatile and Customizable: Want to make it extra chocolaty or switch up the flavor? You can easily add your own twists—use chocolate Oreos, add a peanut butter layer, or even top it with fresh fruit. The possibilities are endless!
- Family-Friendly: This is a recipe that everyone will love, from kids to adults. It’s perfect for family gatherings, parties, or just when you want a sweet treat to enjoy at home.
Whether you’re looking for a simple dessert for a busy weeknight or something that will impress at your next dinner party, this No-Bake Oreo Mud Pie fits the bill. Let’s dive into the ingredients and get started!
2. Ingredients for No-Bake Oreo Mud Pie
This No-Bake Oreo Mud Pie calls for just a handful of simple ingredients, many of which you likely already have in your pantry! Here’s everything you’ll need to create this indulgent treat:
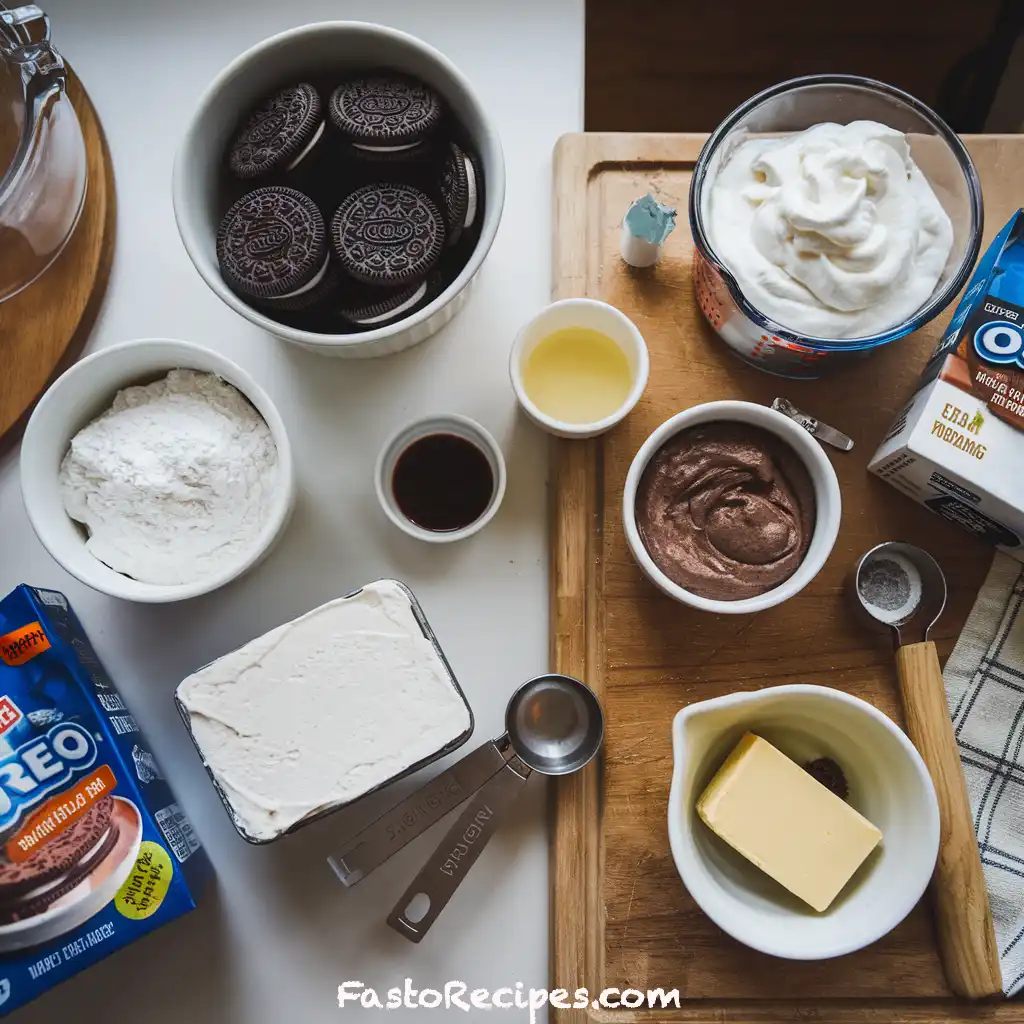
- 24 Oreo cookies: These will form the base of your pie with a crunchy, buttery crust. Feel free to swap in chocolate Oreos for an extra layer of richness!
- 5 tablespoons unsalted butter, melted: The butter helps bind the Oreo crumbs together to create a solid, firm crust. Don’t skip this step—it’s essential for the texture!
- 1 (8 oz) package cream cheese, softened: Cream cheese gives this pie its rich, creamy filling. Be sure to let it soften to room temperature for easy mixing.
- 1 cup powdered sugar: This will sweeten the cream cheese filling and help create a smooth, velvety texture.
- 1 teaspoon vanilla extract: Just a touch of vanilla enhances the overall flavor and brings out the sweetness in the dessert.
- 1 (8 oz) tub whipped topping, thawed: Whipped topping adds airiness to the filling, making it light and fluffy. You can also use homemade whipped cream if you prefer.
- 1 (3.9 oz) package instant chocolate pudding mix: This is the star of the show! It gives the pie its rich, chocolaty layer and helps set the dessert.
- 1 ¾ cups cold milk: This is mixed with the pudding to make it set. Be sure to use cold milk for the best consistency.
- ½ cup crushed Oreos (for topping): These crushed Oreos add texture and a fun crunch on top of the pie. You could even use chocolate chips if you’re craving a little more chocolate.
- ½ cup chocolate sauce: This drizzle will add an extra touch of sweetness and visual appeal. If you like things even more chocolaty, feel free to add more!
- Whipped cream (for garnish): Top your pie with a generous dollop of whipped cream for a dreamy finish.
For a deeper flavor, you can refrigerate the crust for a bit longer—this helps it set up nicely and gives it a firmer texture once the pie is fully assembled. It’s an extra step that’s totally worth it for that perfect slice!
These simple ingredients come together to create a dessert that’s not only delicious but also easy to prepare. Ready to start assembling? Let’s move on to the next step!
3. Instructions for No-Bake Oreo Mud Pie
Now that we have our ingredients ready, it’s time to bring this No-Bake Oreo Mud Pie to life! Follow these simple steps to create a dessert that’s both decadent and easy to prepare. Don’t worry—this process is foolproof, and I’ll guide you through each stage!
Step 1: Make the Oreo Crust
- Crush the Oreos: Begin by crushing the 24 Oreo cookies into fine crumbs. You can use a food processor for a quick, even result, or if you don’t have one, simply place the cookies in a zip-top bag and crush them using a rolling pin. Either method works perfectly!
- Mix with melted butter: In a medium bowl, combine the Oreo crumbs with the 5 tablespoons of melted unsalted butter. Stir until the crumbs are fully coated and the mixture sticks together when pressed.
- Form the crust: Press the Oreo mixture firmly into the bottom of a 9-inch pie dish to form a solid crust. Use the back of a spoon or your fingers to press it down evenly. Once done, pop it in the refrigerator while you prepare the filling to let it set.
Step 2: Prepare the Cream Cheese Layer
- Beat the cream cheese: In a large mixing bowl, beat the 8 oz of softened cream cheese until smooth and creamy. This helps create the perfect base for your pie’s filling.
- Add powdered sugar and vanilla: Gradually mix in the 1 cup of powdered sugar and 1 teaspoon of vanilla extract. Beat everything together until smooth and fully incorporated.
- Fold in the whipped topping: Gently fold in half of the 8 oz tub of thawed whipped topping. This gives the filling a light, fluffy texture. Once it’s well-mixed, spread it evenly over the chilled Oreo crust.
Step 3: Prepare the Chocolate Pudding Layer
- Mix the pudding: In a separate bowl, whisk together the 3.9 oz package of instant chocolate pudding mix and 1 ¾ cups of cold milk. Whisk for about 2 minutes until the pudding thickens up. Let it sit for 5 minutes to fully set.
- Layer the pudding: Once the pudding is thickened, carefully spread it over the cream cheese layer. Use a spatula to smooth it out for an even, delicious layer of chocolate goodness.
Step 4: Add the Final Touches
- Top with whipped topping: Spread the remaining whipped topping over the chocolate pudding layer. Smooth it out for a nice, creamy finish.
- Decorate: Drizzle the ½ cup of chocolate sauce over the top, and sprinkle with the ½ cup of crushed Oreos for a crunchy, decorative touch.
Step 5: Chill and Serve
- Refrigerate the pie: Place your pie in the refrigerator for at least 4 hours, or ideally overnight, to allow it to set. The chilling time is crucial to getting that perfect slice!
- Garnish with whipped cream: Before serving, top each slice with a dollop of whipped cream for a finishing touch of extra creaminess.
To make cutting and serving easier, let the pie sit at room temperature for about 10 minutes before slicing. This will help the filling soften slightly and give you clean, perfect slices every time!
Now that you’ve followed all the steps, it’s time to enjoy this indulgent, no-bake dessert! Get ready for a treat that’s sure to impress everyone at the table.
4. Pro Tips and Variations for No-Bake Oreo Mud Pie
Looking for ways to make this No-Bake Oreo Mud Pie even more amazing? Here are some pro tips and creative variations to elevate this already irresistible dessert:
Pro Tips for Perfect Results
- Chill the crust longer: While refrigerating the pie after assembly is important, don’t forget to chill the Oreo crust for a bit before you add the filling. Letting it set for 20-30 minutes helps the butter firm up and gives the crust extra stability.
- Use softened cream cheese: For the smoothest, lump-free filling, make sure your cream cheese is softened to room temperature. This will ensure it mixes easily and blends seamlessly with the powdered sugar and whipped topping.
- Don’t rush the pudding layer: Give the pudding time to thicken properly before spreading it over the cream cheese layer. If it’s too runny, it may affect the pie’s texture. Be patient, and let it set for the full 5 minutes!
- Allow the pie to chill overnight: While 4 hours of chilling is the minimum, letting the pie set overnight results in a firmer, more flavorful dessert. The layers will meld together beautifully, and the texture will be perfect when sliced.
Fun Variations to Try
- Chocolate Oreo Crust: Swap regular Oreos for chocolate-flavored Oreos to take your crust to the next level. This adds an even deeper chocolate flavor to every bite and is perfect for true chocolate lovers!
- Peanut Butter Twist: Add a layer of peanut butter to the cream cheese mixture for a rich, nutty flavor that pairs beautifully with the chocolate. You can fold ½ cup of smooth peanut butter into the cream cheese filling, or drizzle it on top before adding the whipped cream.
- Fruit Topping: For a fresh twist, top your pie with fresh berries like raspberries, strawberries, or blueberries. The sweetness of the fruit balances out the richness of the pie and adds a vibrant pop of color.
- Add Coffee Flavor: If you love the combination of chocolate and coffee, try adding a teaspoon of instant coffee granules to the chocolate pudding mix. It’ll give the pie a subtle coffee flavor that complements the chocolate beautifully.
- Make It Gluten-Free: To make this dessert gluten-free, simply swap the regular Oreos for gluten-free Oreos. The rest of the ingredients are already naturally gluten-free, making it an easy switch for those with dietary restrictions.
Extra Topping Ideas
- Shaved chocolate: Add extra decadence by topping your pie with freshly shaved chocolate or chocolate curls. It’s a simple yet elegant touch!
- Crushed candy bars: For an added crunch, sprinkle crushed candy bars like Snickers or Reese’s on top. This creates a delightful combination of chocolate and caramel flavors.
- Toffee bits: Add toffee bits or caramel drizzle for a sweet, buttery crunch on top of your pie.
With these tips and variations, you can easily customize this No-Bake Oreo Mud Pie to suit your personal taste or to impress your guests with a unique twist. Whether you keep it classic or add your own flair, this dessert will always be a crowd-pleaser!
5. Serving Suggestions for No-Bake Oreo Mud Pie
Now that your No-Bake Oreo Mud Pie is ready to go, let’s talk about how to serve it in style! Whether you’re hosting a special event or just enjoying a slice at home, presentation can make all the difference. Here are a few serving suggestions to elevate your dessert experience:
1. Serve Chilled for the Best Texture
- The pie is at its best when it’s thoroughly chilled, so make sure it has had enough time in the fridge to set properly. Not only will this help the layers firm up, but the flavors will also have time to meld together.
- Pro Tip: Take the pie out of the fridge for about 10 minutes before slicing to make cutting easier and ensure cleaner, more defined slices.
2. Garnish with Fresh Whipped Cream
- A generous swirl of freshly whipped cream is the perfect topping for this rich dessert. You can either pipe it onto each slice or simply dollop it on top for a more casual look.
- Variation: Add a sprinkle of cocoa powder or even a few chocolate shavings on top of the whipped cream for extra indulgence.
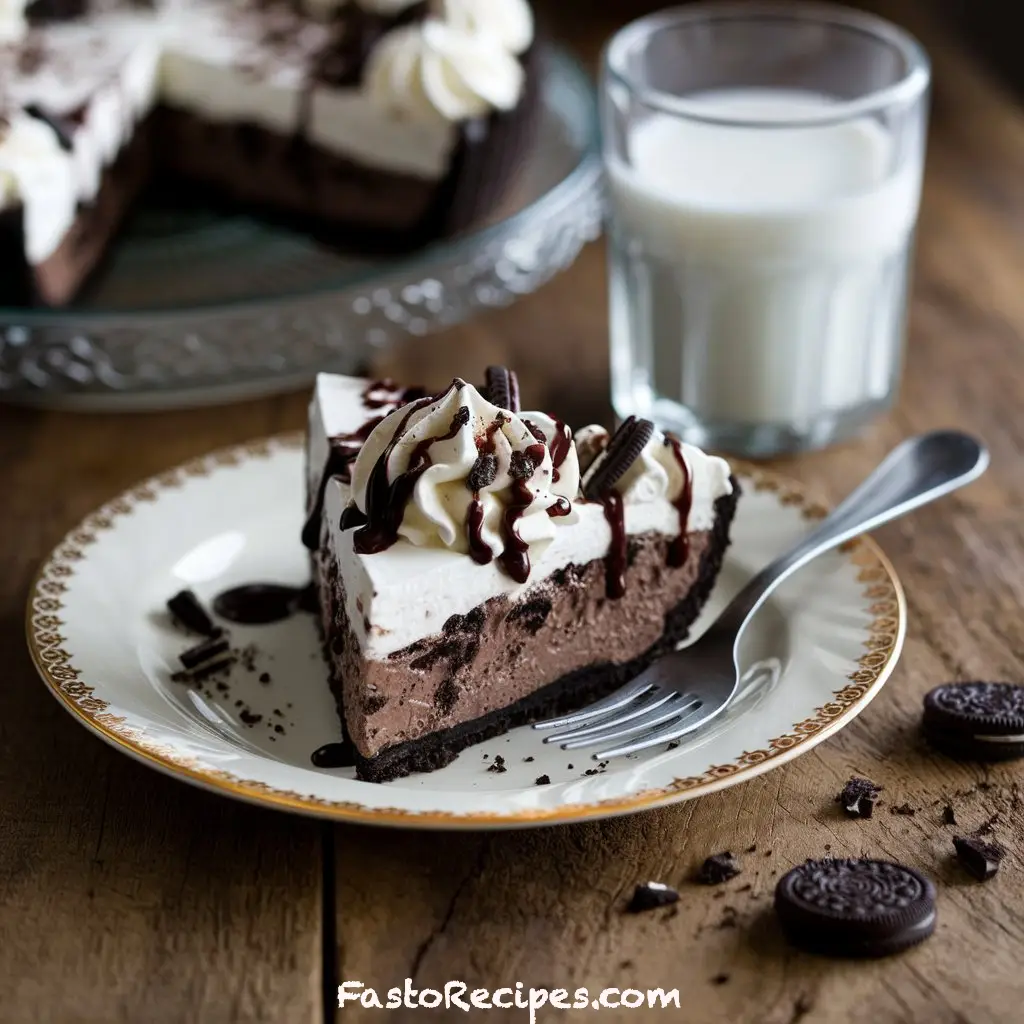
3. Pair with a Hot Beverage
- If you’re serving this dessert after dinner, consider pairing it with a warm beverage like coffee, hot chocolate, or even a rich espresso. The slightly bitter notes of coffee or cocoa balance out the sweetness of the pie beautifully.
- Pro Tip: For a decadent treat, drizzle a little extra chocolate sauce over your coffee cup to create a fun chocolate coffee experience!
4. Add Fresh Fruit for a Light Touch
- A sprinkle of fresh fruit can add a refreshing contrast to the richness of the pie. Berries like strawberries, raspberries, or blueberries work wonderfully here, adding a burst of color and tang to each bite.
- Fun Tip: Arrange the fruit in a fun design on top of the pie before serving—think a heart shape for special occasions or a simple border for a more elegant look.
5. Serve in Individual Portions
- If you want to create a more personal experience, slice the pie into smaller portions and serve them in individual dessert cups or mason jars. This makes it easier to serve and gives a charming, rustic presentation.
- Pro Tip: If you choose the mason jar route, layer the pie in the jar for a fun “layered dessert” look. The see-through jars will showcase the beautiful layers of chocolate pudding, cream cheese filling, and Oreo crust.
6. Top with Extra Crushed Oreos or Sprinkles
- For a fun finishing touch, add extra crushed Oreos on top of the whipped cream, or even some colorful sprinkles for a festive vibe, especially if you’re serving this for a party or a special occasion.
- Variation: Crushed candy bars or a drizzle of caramel sauce can also add a delicious flair to your pie, making it extra indulgent.
7. Perfect for Parties or Potlucks
- This pie is great for sharing! Slice it into small pieces and serve at your next family gathering, BBQ, or potluck. It’s easy to transport and will definitely be a crowd favorite.
- Pro Tip: If you’re bringing this pie to a party, pre-slice the portions and cover them tightly with plastic wrap so they stay fresh and intact.
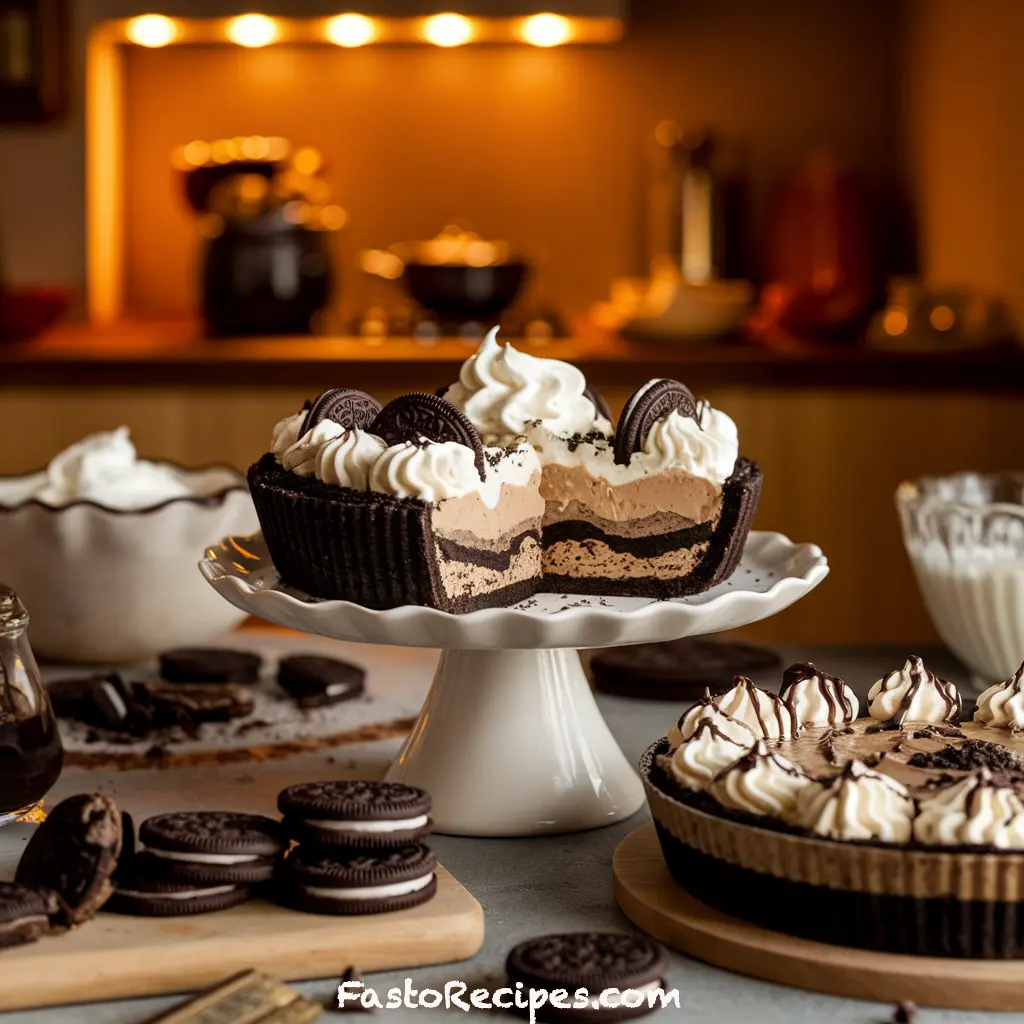
6. Conclusion: Why You’ll Love No-Bake Oreo Mud Pie
There’s no doubt about it—this No-Bake Oreo Mud Pie is a dessert dream come true! From the rich Oreo crust to the creamy layers of chocolate and cream cheese, every bite is a perfect combination of indulgent flavors and textures. Plus, with the added bonus of not needing to turn on the oven, it’s the ideal treat for busy days, hot summer afternoons, or when you’re simply craving something sweet without a lot of fuss.
What Makes This Pie So Special?
- Easy to Make: You don’t have to be a baking expert to pull this off. With just a few simple ingredients and minimal prep, you can create a dessert that looks and tastes like it came from a professional bakery.
- Perfectly Balanced Flavors: The rich chocolate pudding layer, light and airy cream cheese filling, and crunchy Oreo crust come together in perfect harmony. Every bite is a satisfying mix of creamy, crunchy, and chocolaty goodness.
- Customizable: Whether you add extra toppings like fruit, whipped cream, or chocolate sauce, or try a fun variation like peanut butter or chocolate Oreos, you can easily make this pie your own.
A Dessert for Every Occasion
This No-Bake Oreo Mud Pie is versatile enough for any occasion—be it a family dinner, a birthday party, or a simple weeknight treat. It’s a crowd-pleaser, easy to make, and always delivers that wow factor.
So, the next time you’re looking to satisfy your sweet tooth or impress your guests, give this dessert a try. Whether you stick to the classic recipe or add your own spin, one thing is for sure: you’ll be coming back for seconds!

And if you love easy, delicious desserts, check out these other mouthwatering recipes:
- For a tangy twist on a classic dessert, try Lemon Meringue Pie Bars—a refreshing, zesty treat with a creamy meringue topping.
- If you’re looking for a comforting, hearty meal, you won’t want to miss Poor Man’s Husband Casserole. It’s the perfect budget-friendly, satisfying dish for any weeknight.
- And for dinner, why not pair your dessert with a savory dish like Garlic Parmesan Beef Spaghetti Pasta? It’s a rich, flavorful pasta that your family will love.
FAQs
1. Can I make No-Bake Oreo Mud Pie ahead of time?
- Absolutely! In fact, making this pie a day ahead is a great idea. It allows the layers to fully set, and the flavors to deepen, making each slice even more delicious. Simply cover it tightly with plastic wrap and store it in the fridge for up to 2-3 days.
2. Can I substitute the cream cheese in the filling?
- Yes, if you’re not a fan of cream cheese, you can swap it out for mascarpone cheese for a slightly milder flavor, or even Greek yogurt for a tangy twist. Both options will give you that creamy texture, but with a different flavor profile.
3. How long should I chill the pie?
- For the best texture, you’ll want to chill the pie for at least 4 hours, but overnight is even better! This gives the layers enough time to set up properly, ensuring each slice holds its shape when served.
4. Can I freeze No-Bake Oreo Mud Pie?
- Yes, you can freeze it! If you want to make the pie ahead of time and store it for longer, freeze it for up to 1 month. When you’re ready to serve, let it thaw in the fridge for a few hours. The texture may change slightly, but it will still taste great!
5. Can I add extra ingredients to the pudding layer?
- Definitely! You can mix in crushed chocolate chips, peanut butter, or even some mini marshmallows for extra texture. If you’re feeling adventurous, adding a bit of instant coffee to the pudding mix gives it a delightful mocha flavor that pairs beautifully with chocolate.
6. What’s the best way to slice the pie?
- To get clean slices, it’s best to use a sharp knife. If you’re having trouble with sticking, run the knife under hot water between each cut, then wipe it dry. This will help you cut through the layers without disturbing the pie too much.
7. Can I use a different cookie for the crust?
- While Oreos are classic and deliver the best flavor and texture, you can switch things up by using a different type of cookie like chocolate wafer cookies, chocolate chip cookies, or even graham crackers if you want a slightly different base.
8. How can I make this dessert more decadent?
- If you want to take this pie to the next level, try adding a drizzle of hot fudge sauce or caramel syrup over the top just before serving. You can also sprinkle chopped toffee bits, chocolate shavings, or even crushed candy bars for extra flavor and crunch.

No-Bake Oreo Mud Pie
- Total Time: 4 hours 20 minutes
- Yield: 8 1x
Description
Indulge in this easy, delicious No-Bake Oreo Mud Pie! A creamy, chocolatey dessert with a crunchy Oreo crust—perfect for any occasion.
Ingredients
For the crust:
- 24 Oreo cookies
- 5 tablespoons unsalted butter (melted)
For the filling:
- 1 8 oz package cream cheese, softened
- 1 cup powdered sugar
- 1 teaspoon vanilla extract
- 1 8 oz tub whipped topping, thawed
- 1 3.9 oz package instant chocolate pudding mix
- 1 ¾ cups cold milk
For the topping:
- ½ cup crushed Oreos
- ½ cup chocolate sauce
- Whipped cream (for garnish)
Instructions
Prepare the crust:
- Crush the Oreo cookies into fine crumbs using a food processor or by placing them in a zip-top bag and using a rolling pin.
- Combine the Oreo crumbs with the melted butter and press the mixture firmly into the bottom of a 9-inch pie dish to form the crust.
- Refrigerate the crust while preparing the filling.
Make the cream cheese filling:
- In a mixing bowl, beat the softened cream cheese until smooth.
- Add powdered sugar and vanilla extract, mixing until fully combined.
- Gently fold in half of the whipped topping into the cream cheese mixture until smooth and creamy.
- Spread the cream cheese filling over the chilled Oreo crust.
Prepare the chocolate pudding layer:
- In a separate bowl, whisk together the instant chocolate pudding mix and cold milk for 2 minutes until it thickens.
- Let it set for about 5 minutes to ensure it’s firm before layering.
Assemble the pie:
- Layer the chocolate pudding over the cream cheese layer in the pie dish.
- Top with the remaining whipped topping, spreading it evenly.
Add the finishing touches:
- Drizzle chocolate sauce over the pie.
- Sprinkle crushed Oreos on top for decoration and an extra crunch.
Chill the pie:
- Refrigerate the pie for at least 4 hours, or overnight for best results. This allows the pie to fully set and makes for cleaner slices.
Serve and enjoy:
- Before serving, add a dollop of whipped cream on top for an extra touch of indulgence.
- Slice, serve, and enjoy the creamy, chocolatey goodness!
Notes
Nutrition Information (per serving):
- Calories: 380 kcal
- Fat: 22g
- Saturated Fat: 11g
- Cholesterol: 45mg
- Sodium: 250mg
- Carbohydrates: 45g
- Fiber: 2g
- Sugar: 33g
- Protein: 4g
- Prep Time: 20 minutes
- Category: Dessert
- Cuisine: American
Nutrition
- Calories: 380
Keywords: No-Bake Oreo Mud Pie


4 thoughts on “No-Bake Oreo Mud Pie: The Creamy, Dreamy Delight!”